The Architecture of a Croissant

A croissant has a really unique structure. It seems like it was constructed this way on purpose, but never came together in perfect harmony. It’s like a lot of different architectural elements were considered and then scrapped and what you’re left with is the croissant. A spiral staircase? A geodesic dome? Vaulted ceilings? Secret passageways?
Maybe all of the above.
I know that buildings are designed and constructed for a specific purpose. Hospitals have long hallways with multiple rooms, an apartment building will have an elevator AND stairwells that run the height of the building, and a theater has lots of seating on some degree of slope. Baked goods are similar, in that the type of dough or batter they are made with also serves a specific purpose.
Look at brownies, for example. People are very specific about the preferred texture of their brownies…cakey, gooey or fudgy, all of which come from alterations to the batter. Not to mention the people who only eat edge or corner pieces. (Brownie snobs! You know who you are. 😉) Sticky buns are made with a soft, sweet dough, muffins and cakes have soft crumbs, which are different from the crumbs you find in a crispy cookie.
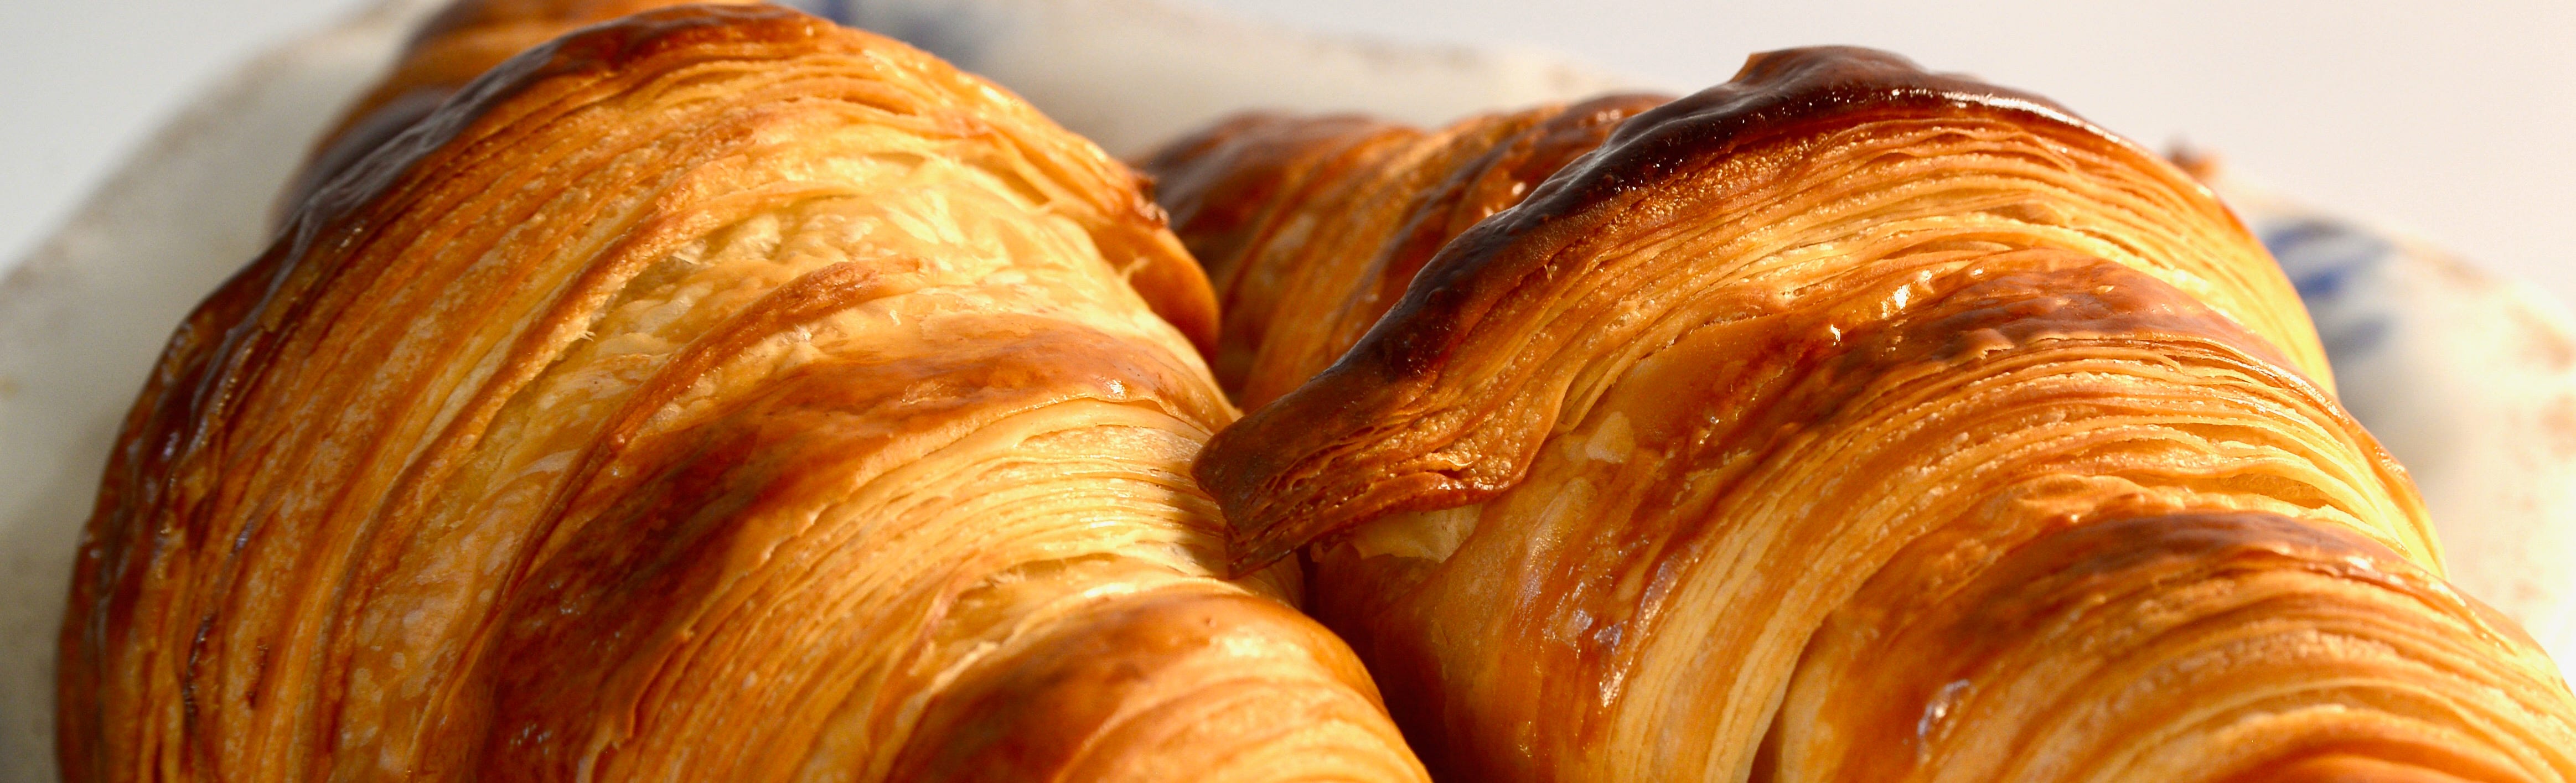
Croissants are on a whole different level. They are a type of viennoiserie, an enriched yeasted bread. But they are made with a laminated dough. This means that there are multiple layers of dough and butter that are stacked on top of each other throughout the process. When you put the dough in the oven, the butter melts and creates steam that gets trapped in a pocket of gluten. The walls of gluten firm into place as baking continues and in the end you’re left with layers and layers of thin stretchy bread with airy cells.
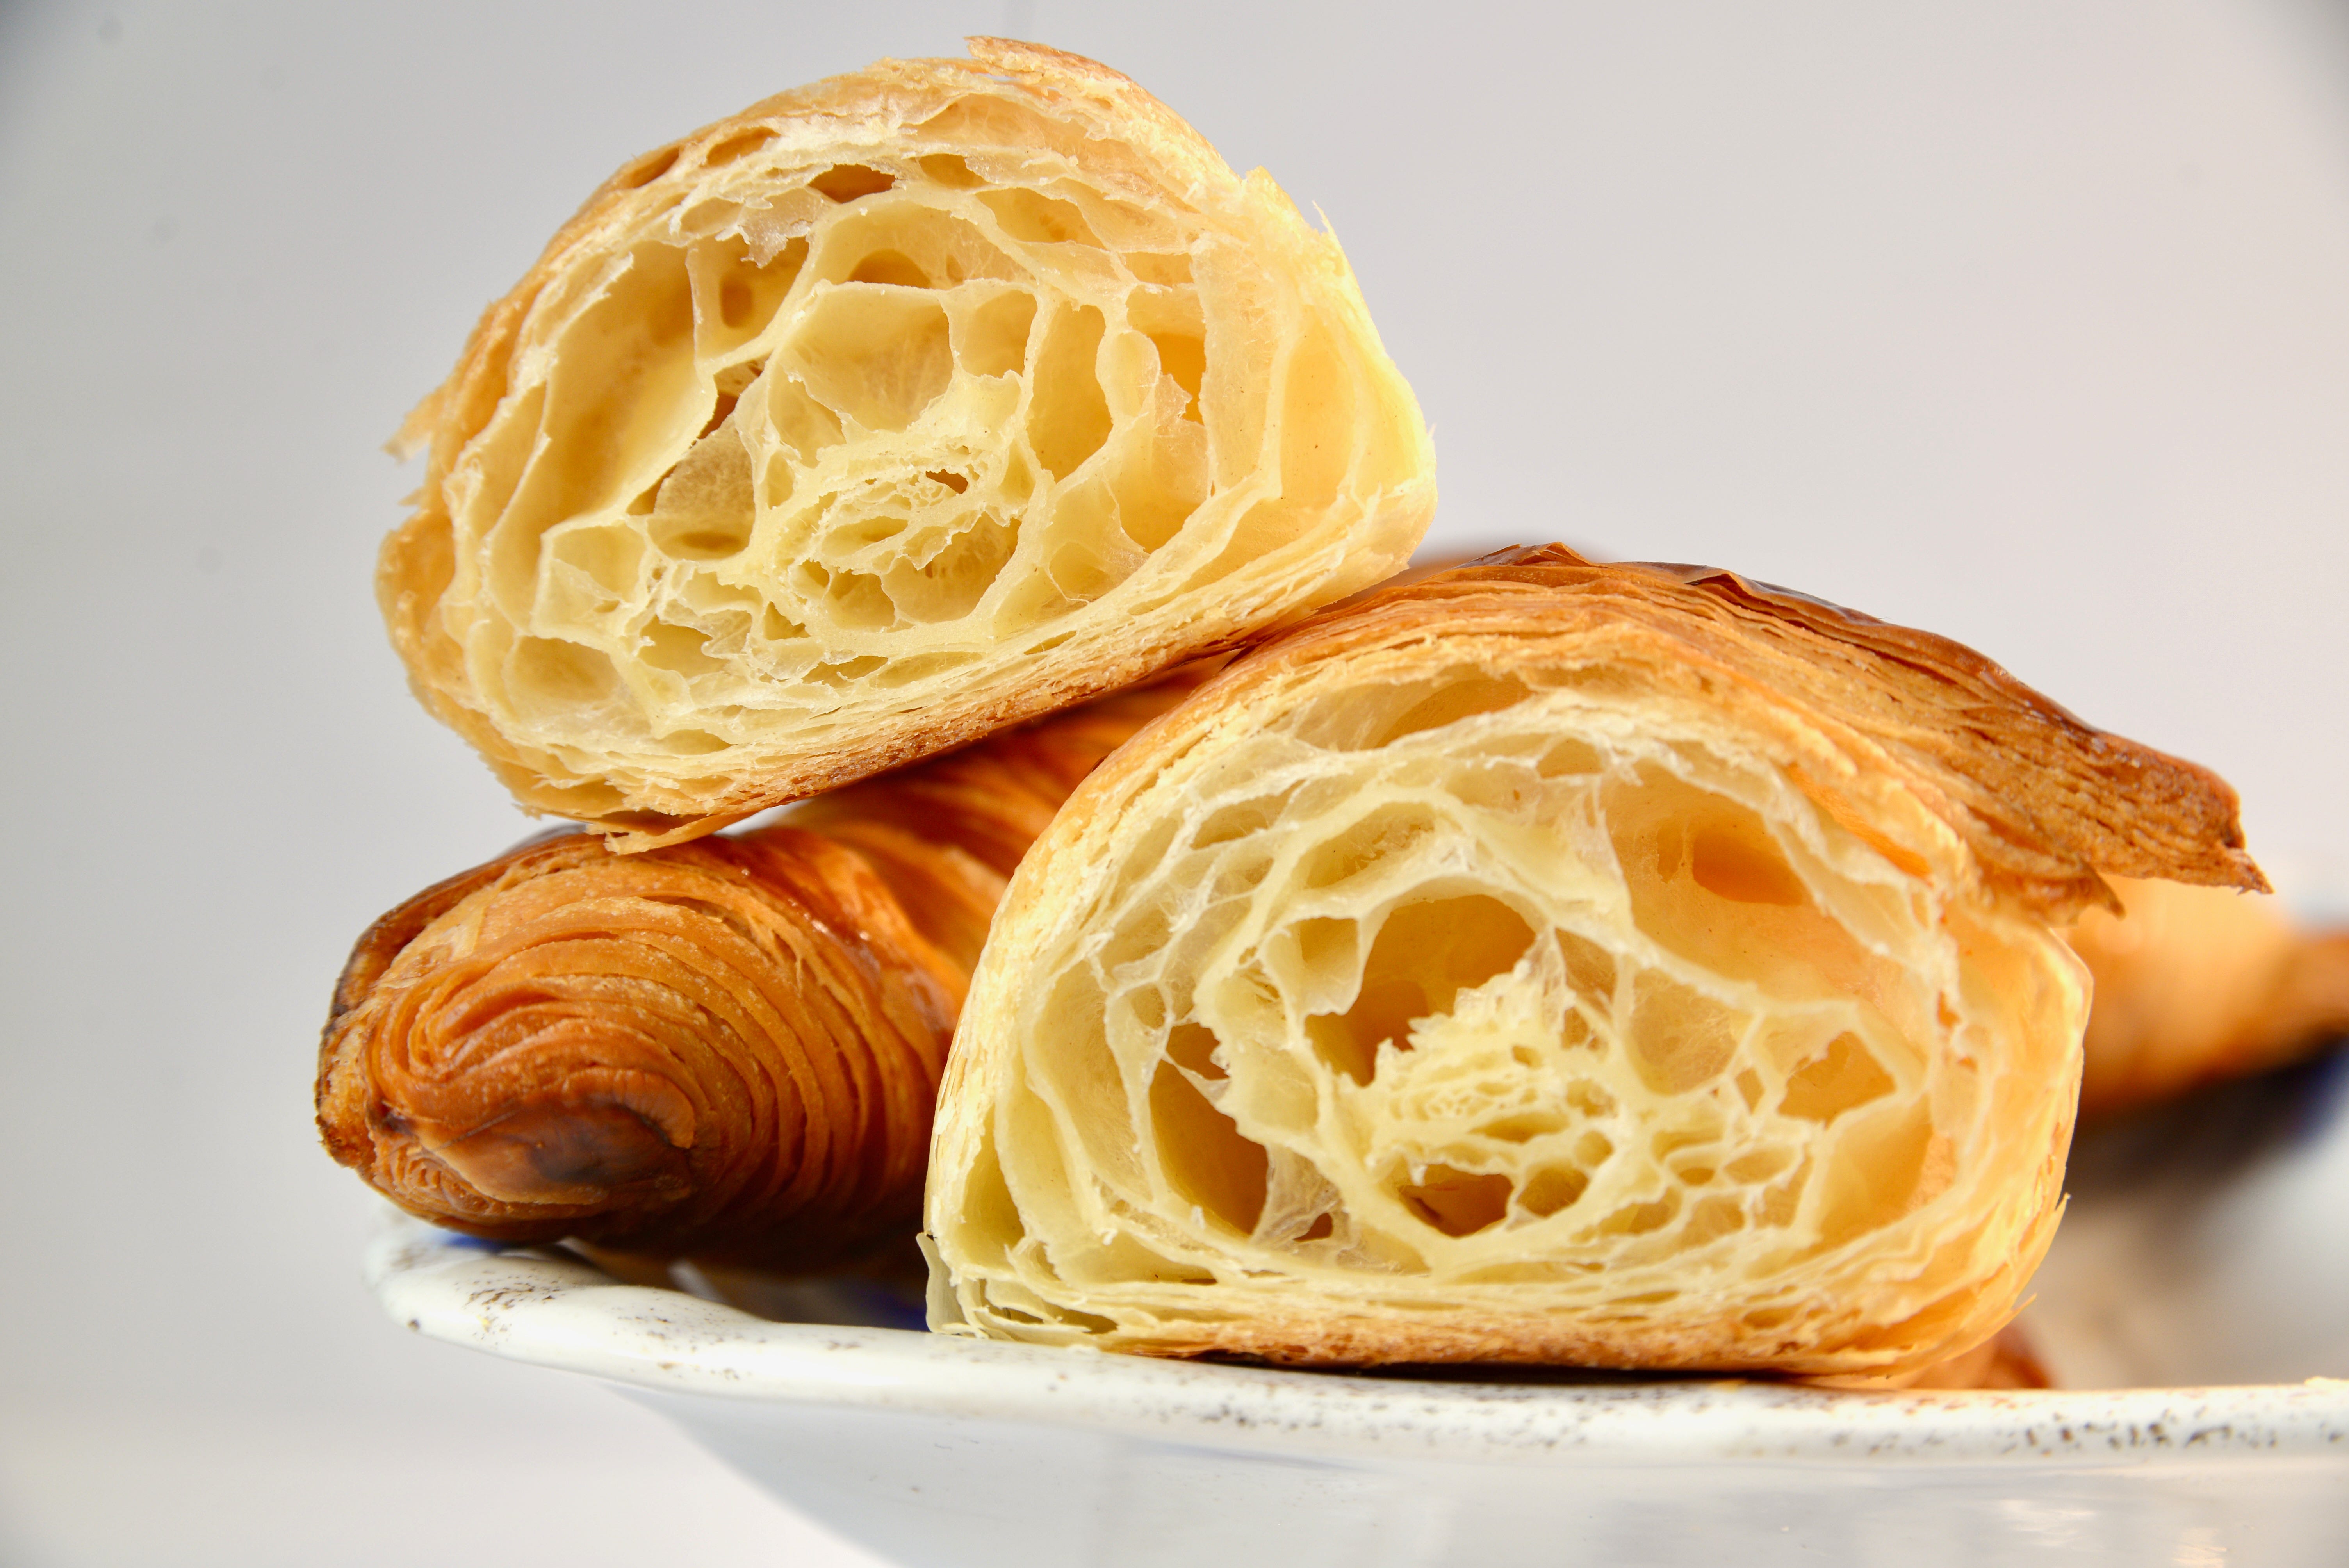
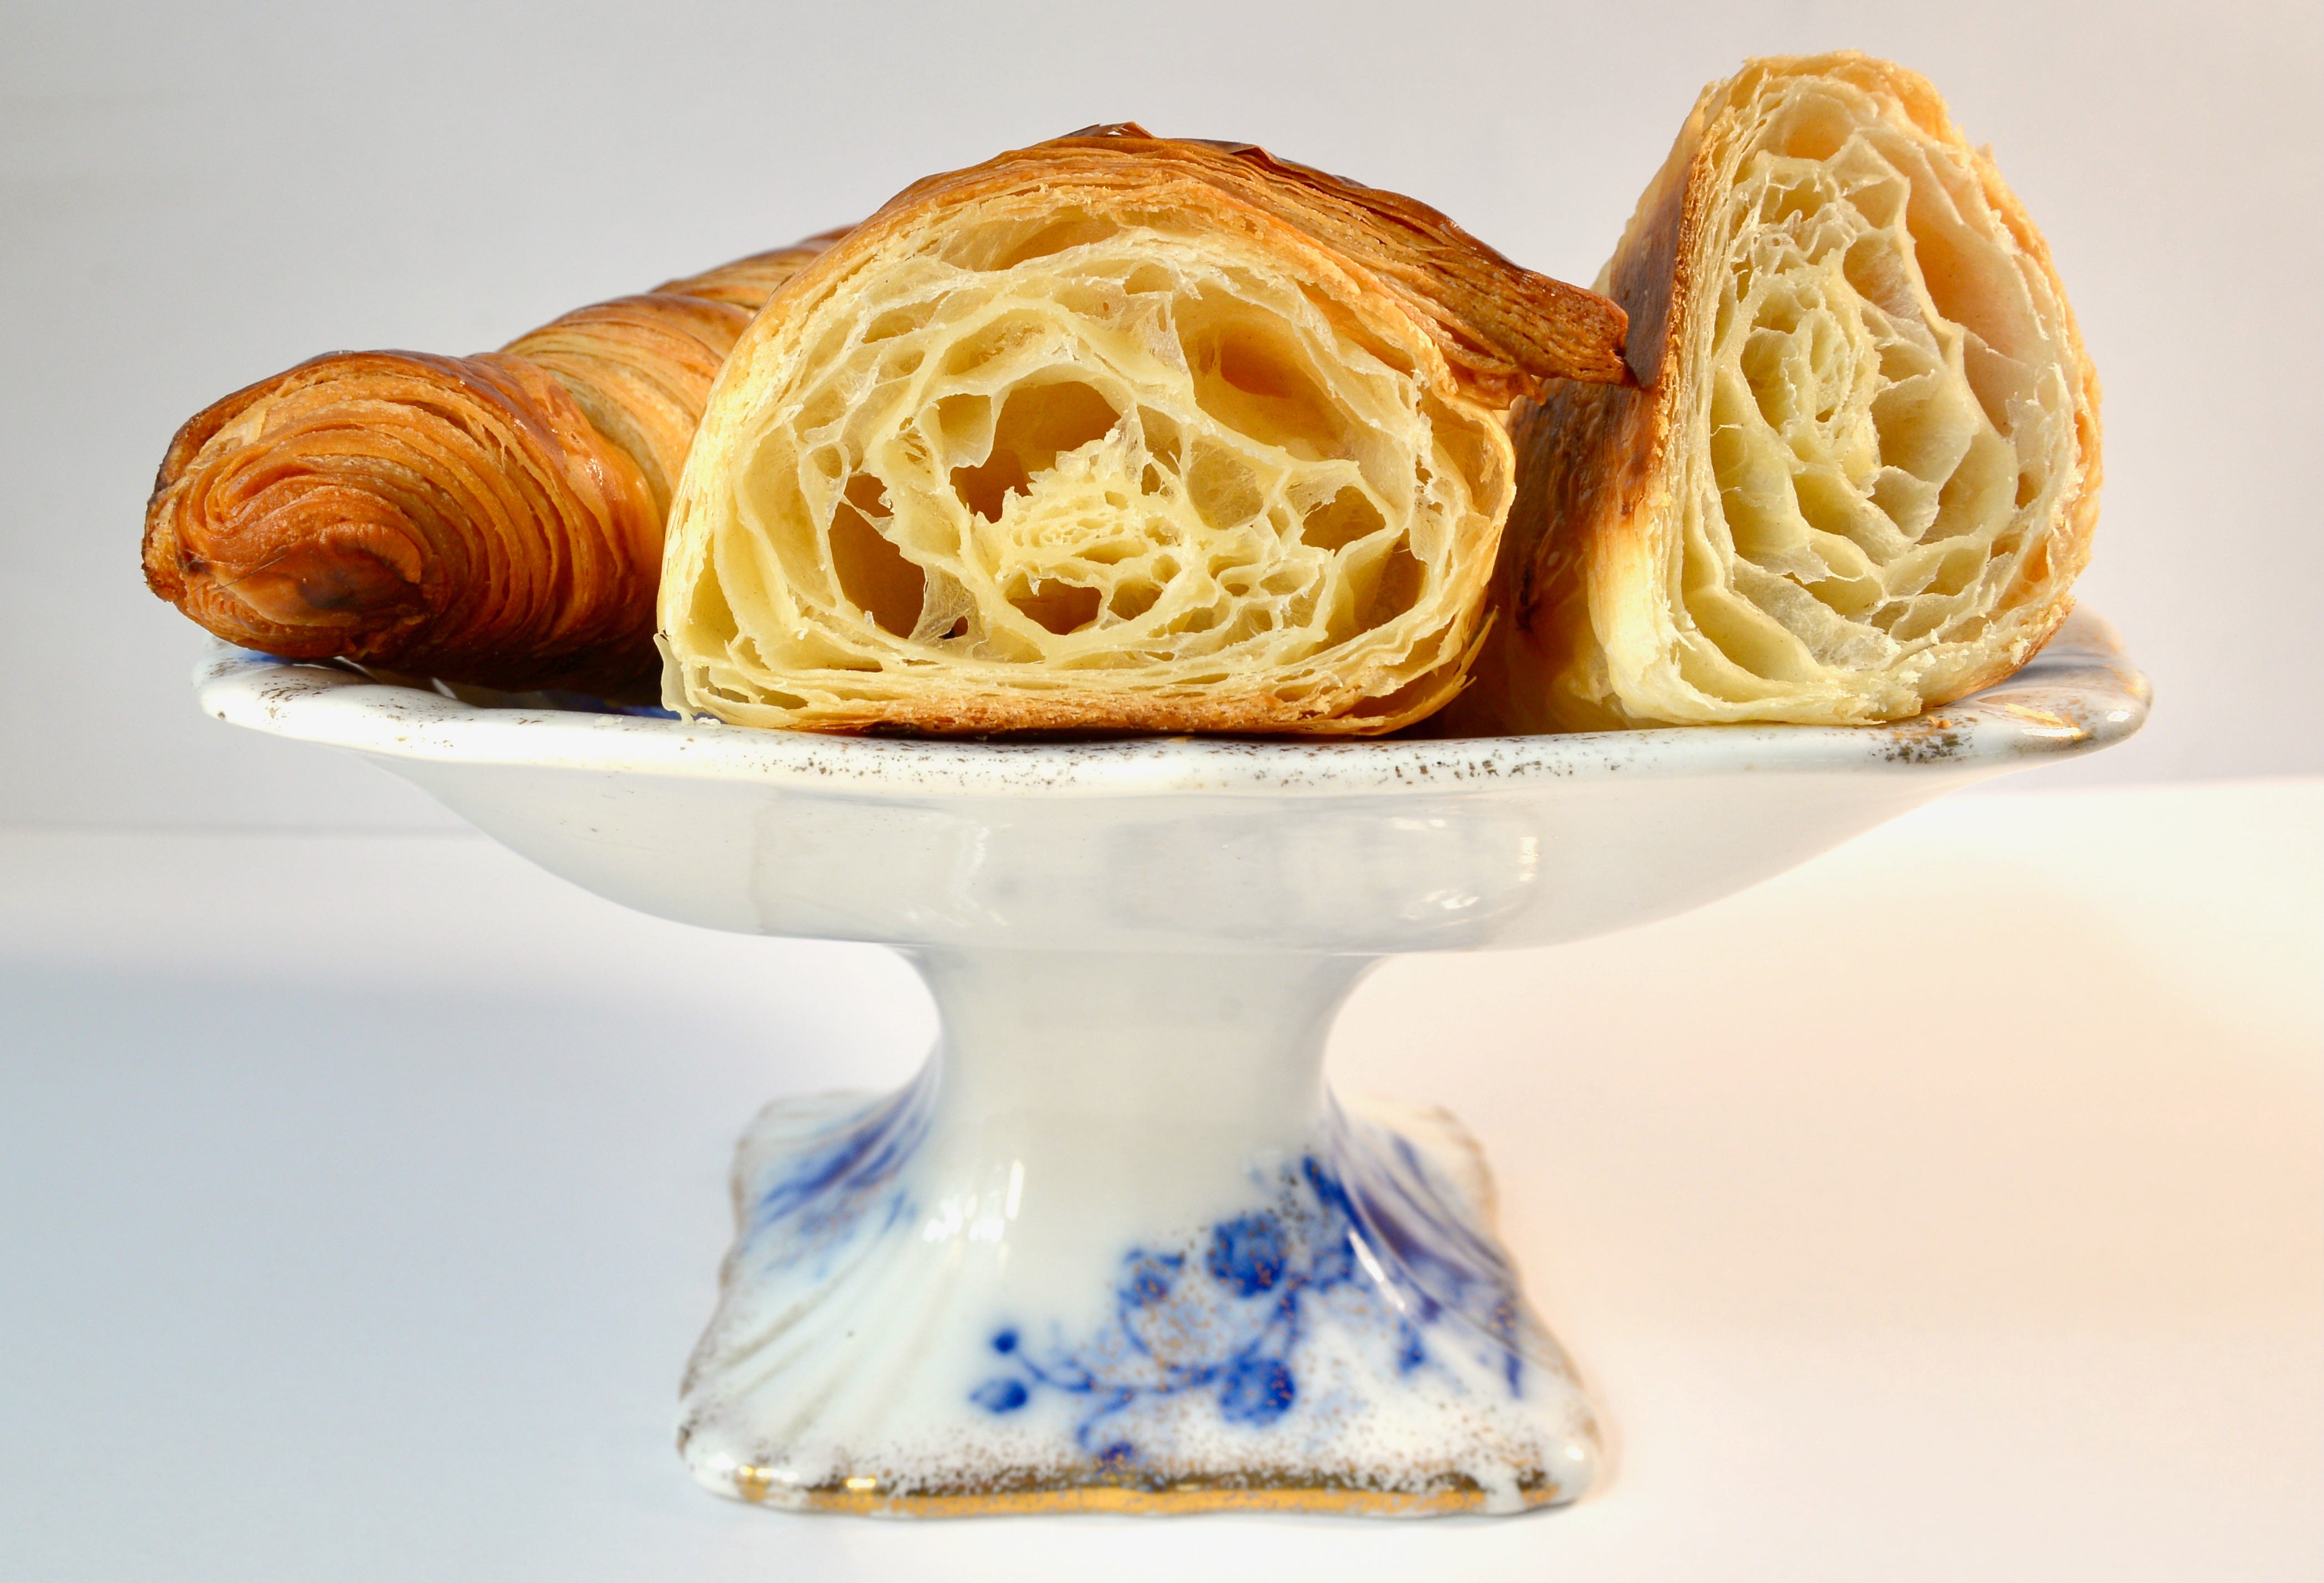
You can see the different layers of dough on the outside that have been individually separated by the multiple layers of butter. And then you get to the inside and oh my goodness, what a sight! But let’s start on the outside.
Biting into a croissant creates an explosion. I don’t mean an explosion on your taste buds, I mean a literal explosion of flaky pastry shrapnel on your lips and cheeks. It’s one of my favorite parts about eating a croissant. And when you pull the buttery baked-goodness away, after your teeth have separated the bite from the body and there are laminate shards on your face? It’s ok. You are forgiven. It can’t be helped.
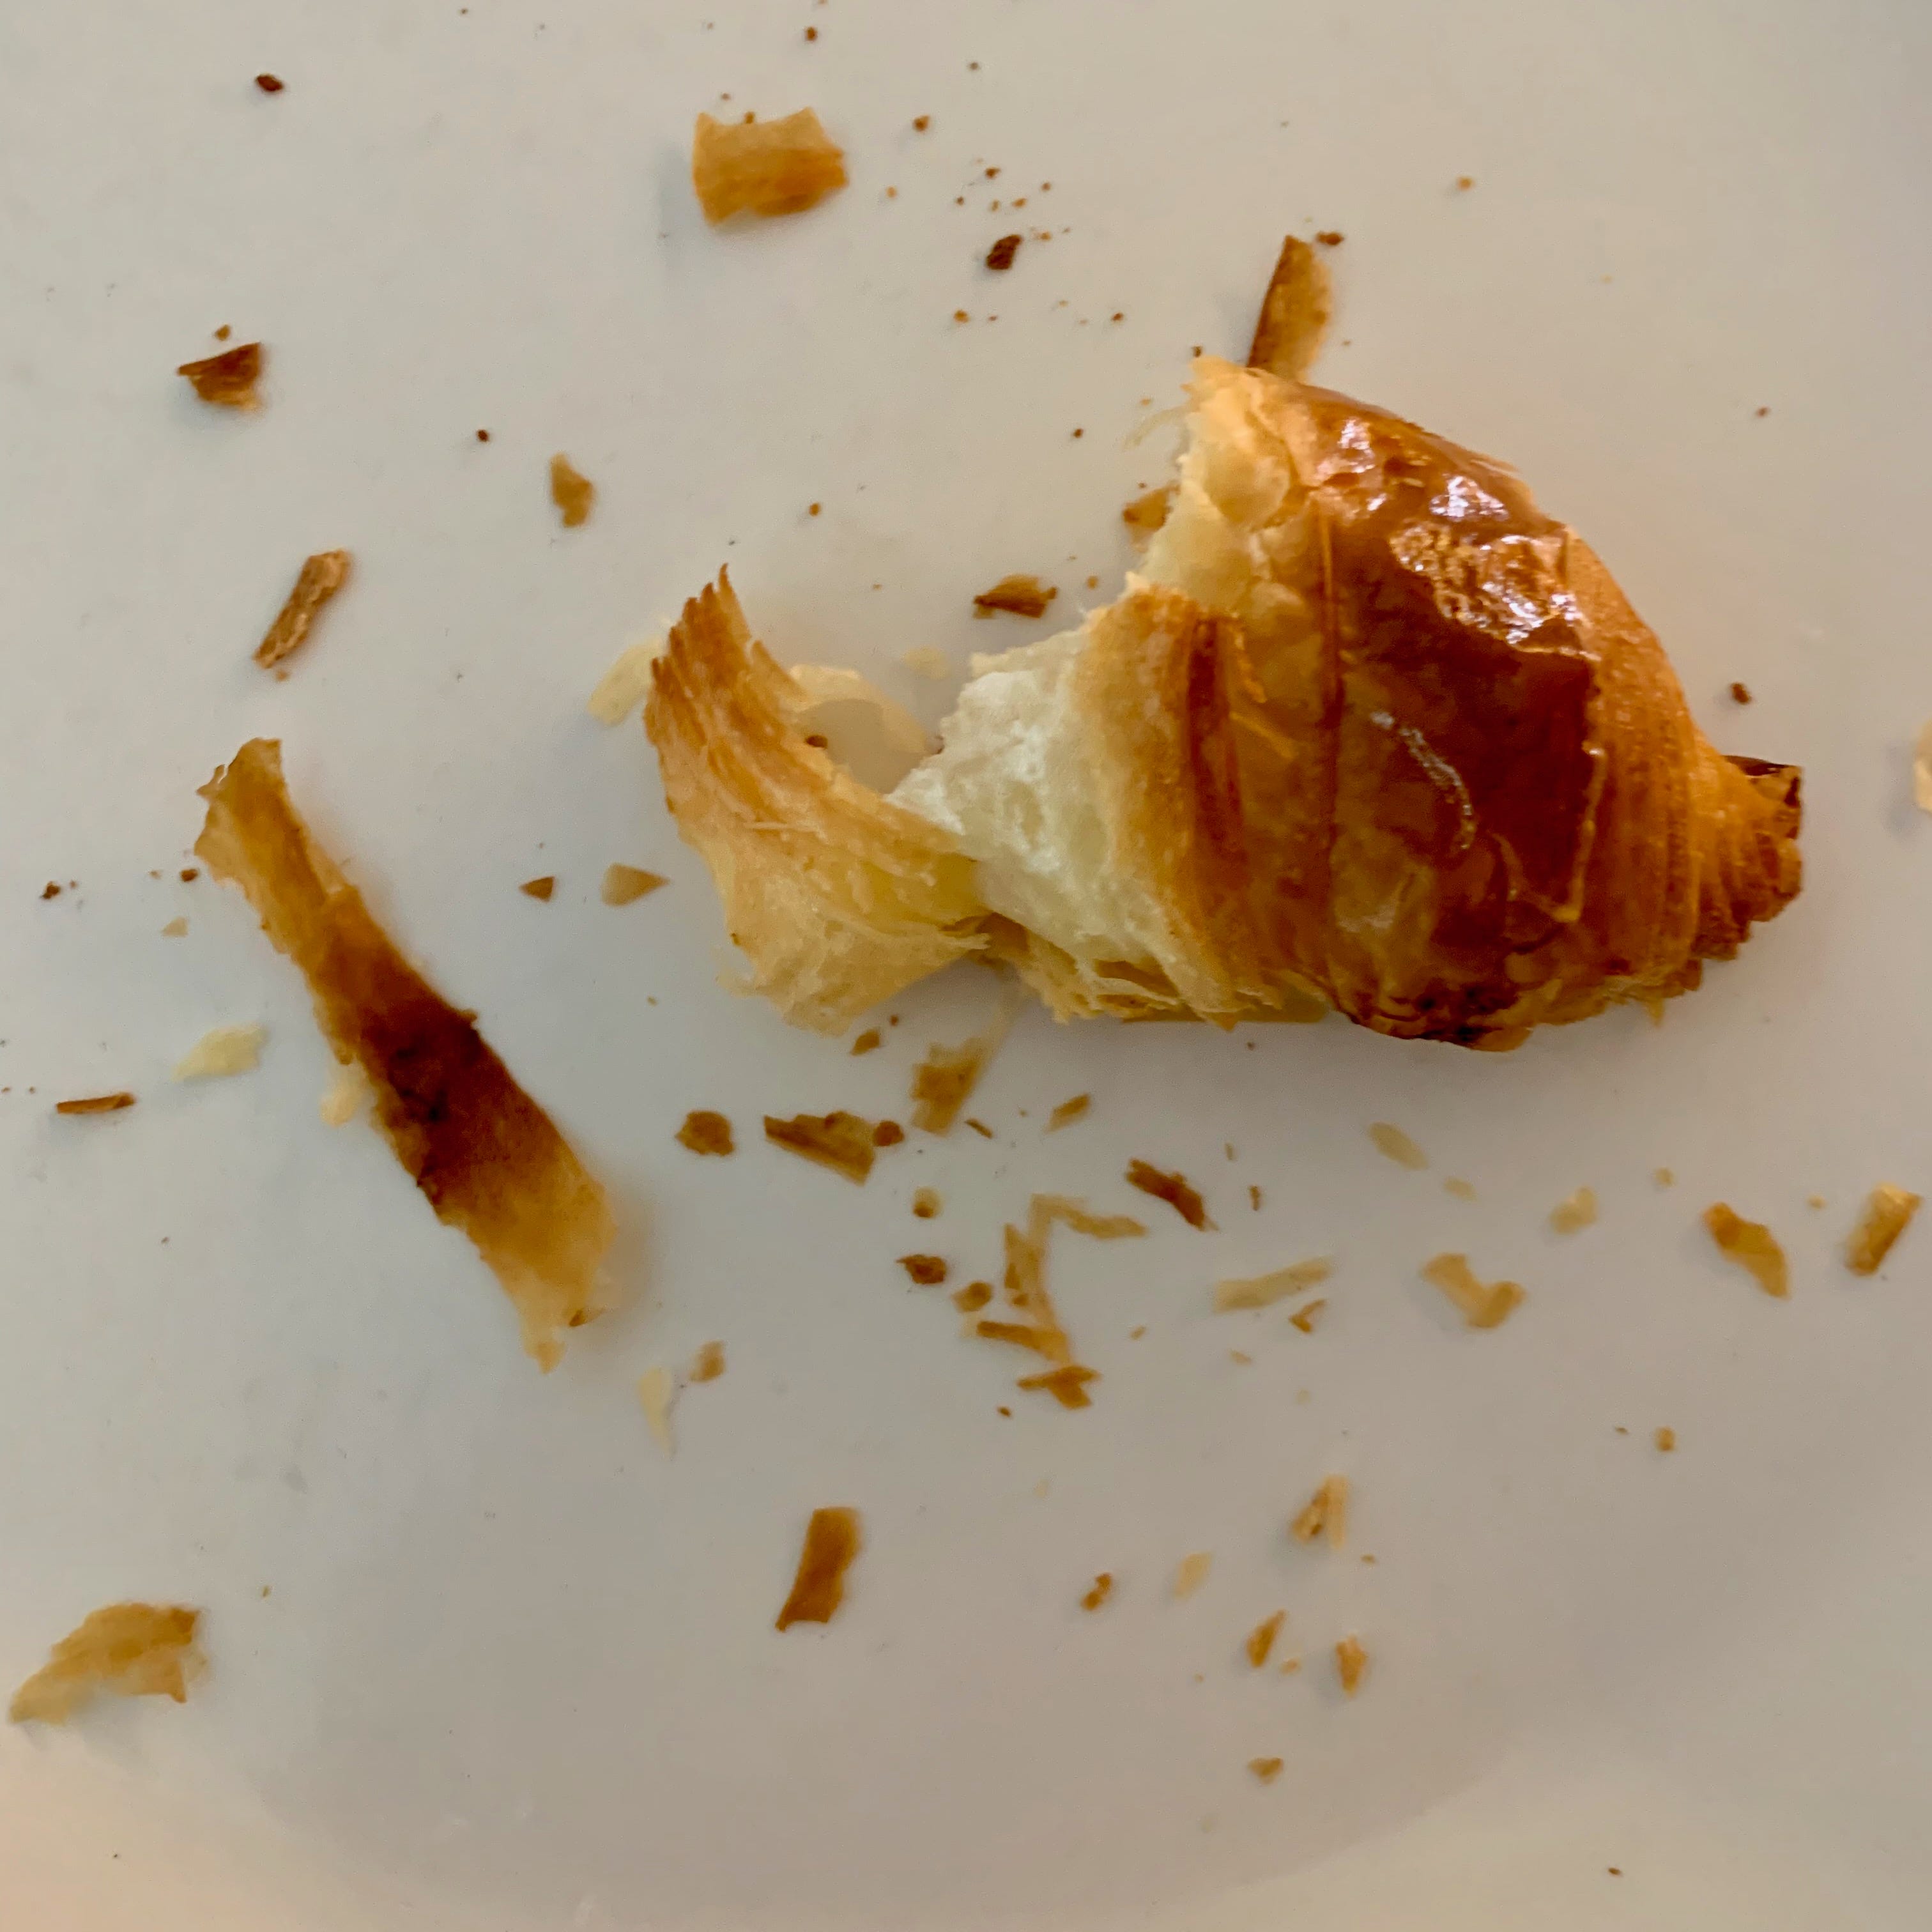
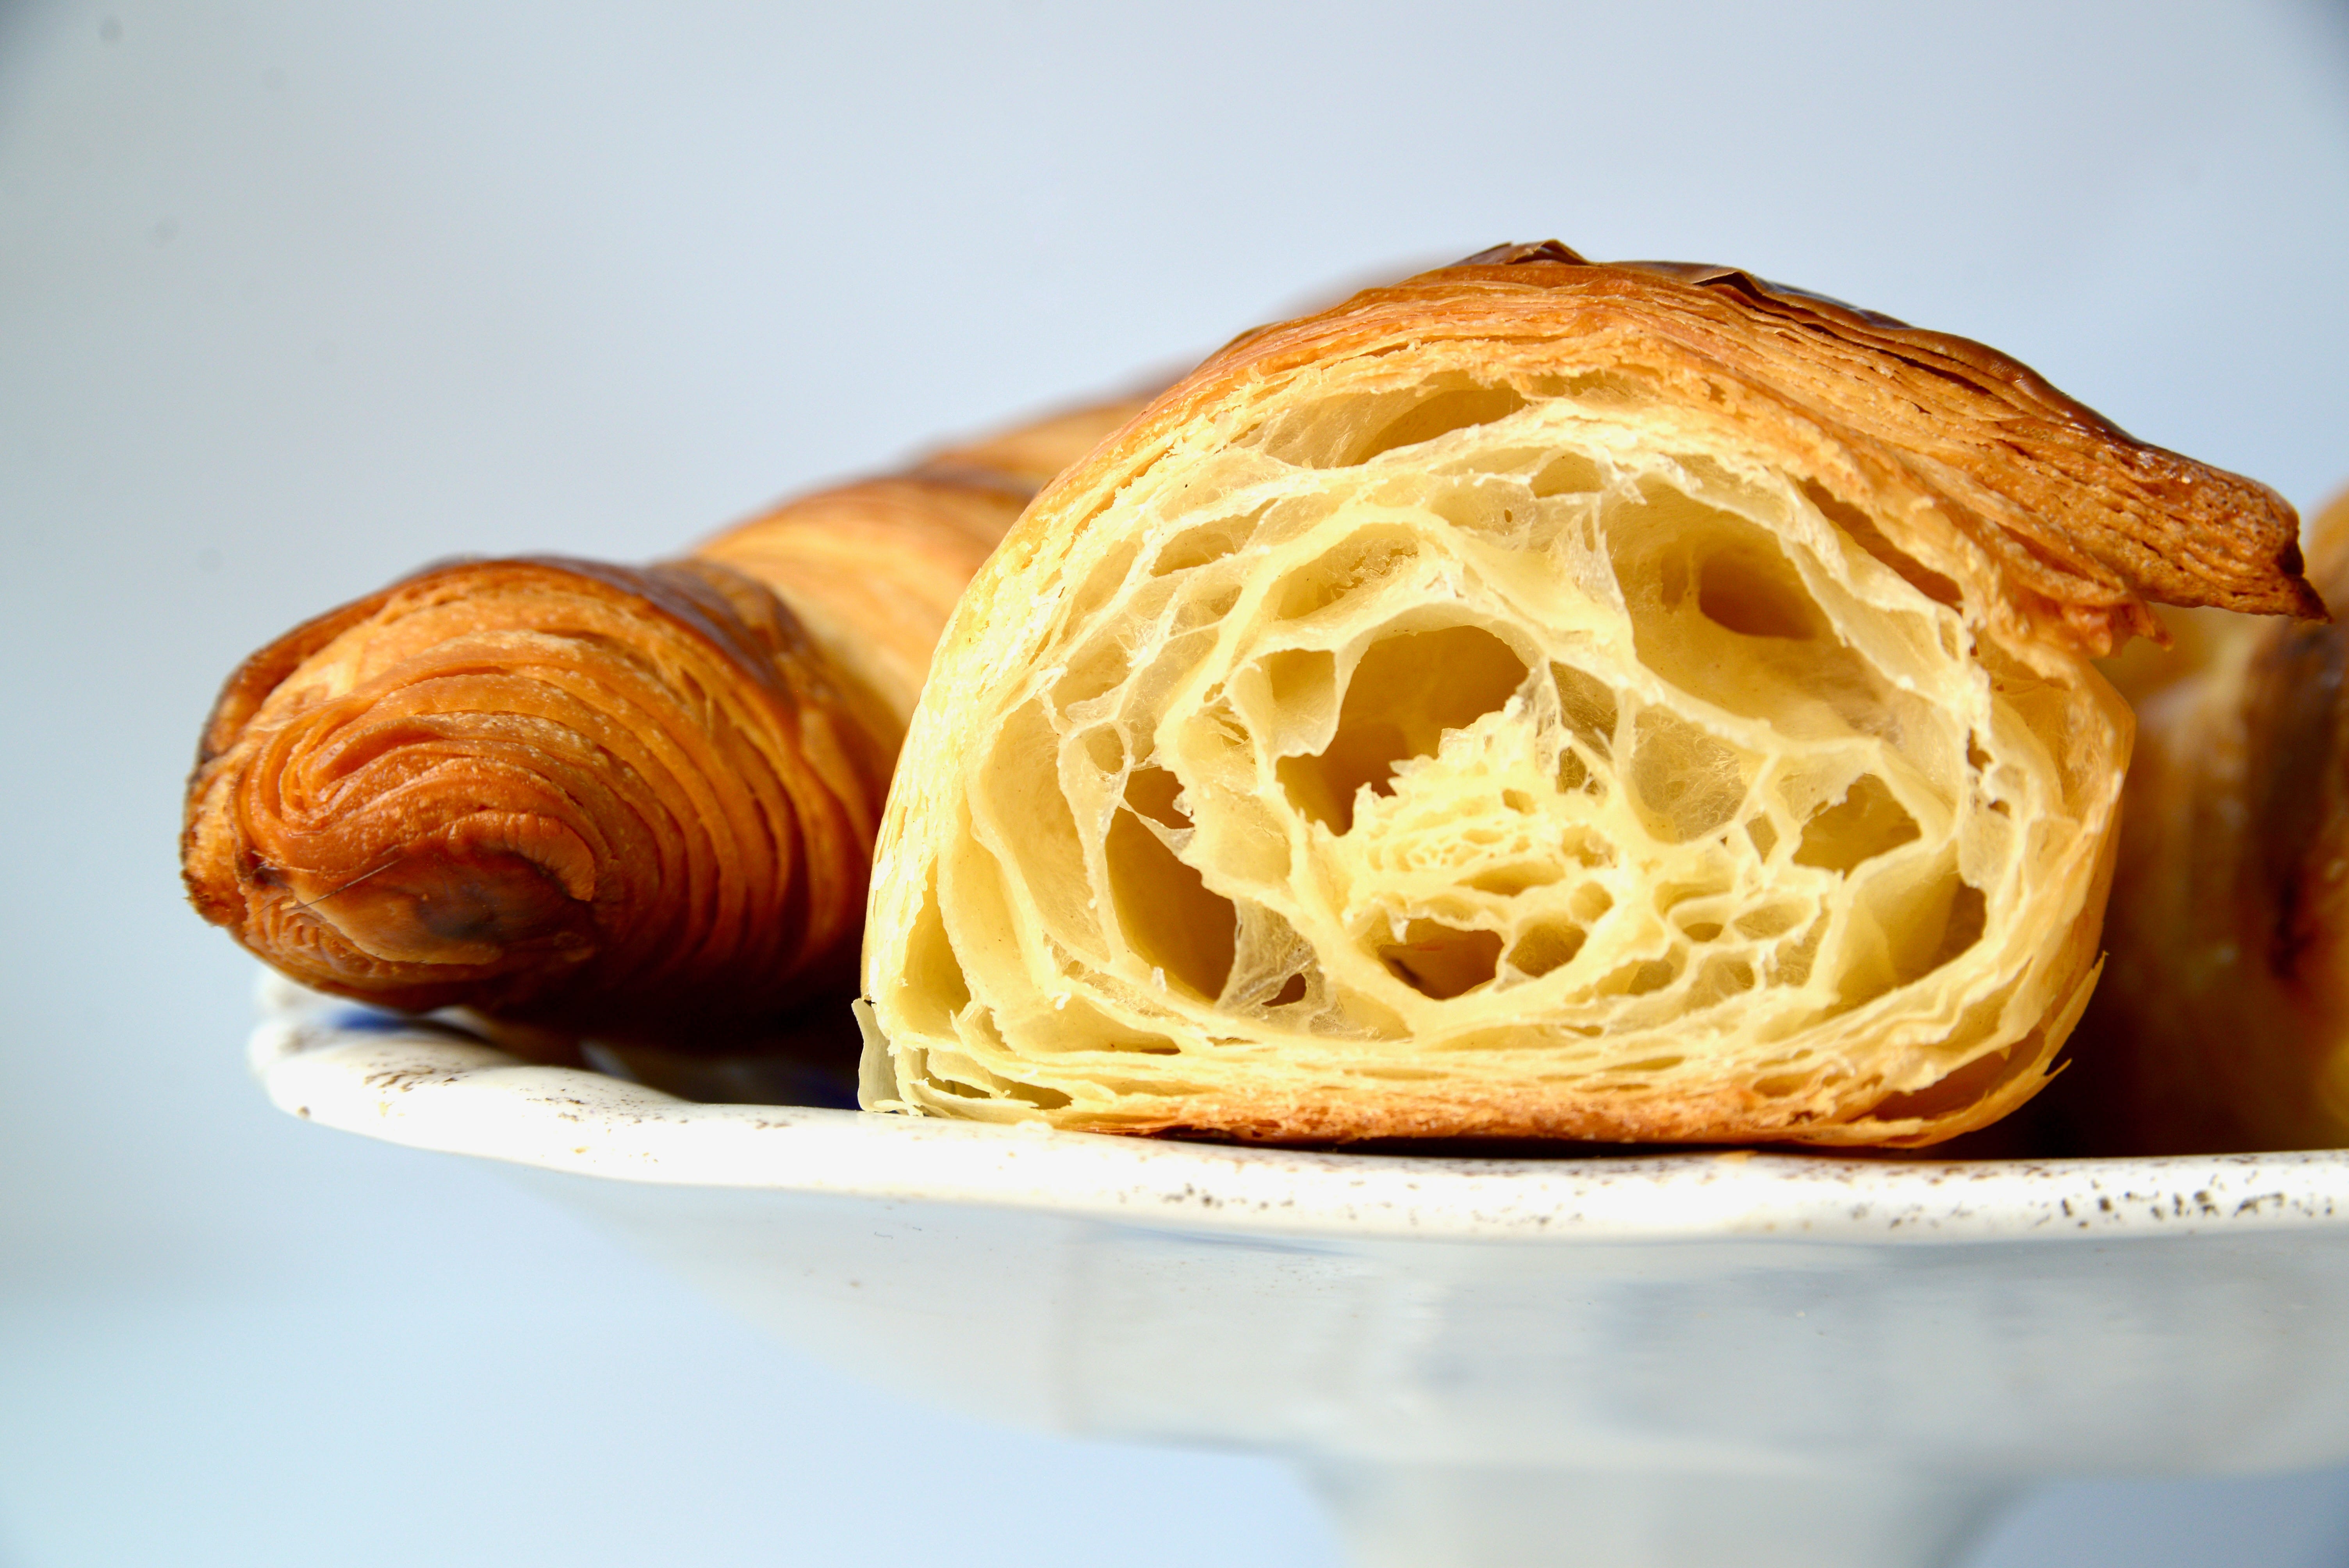
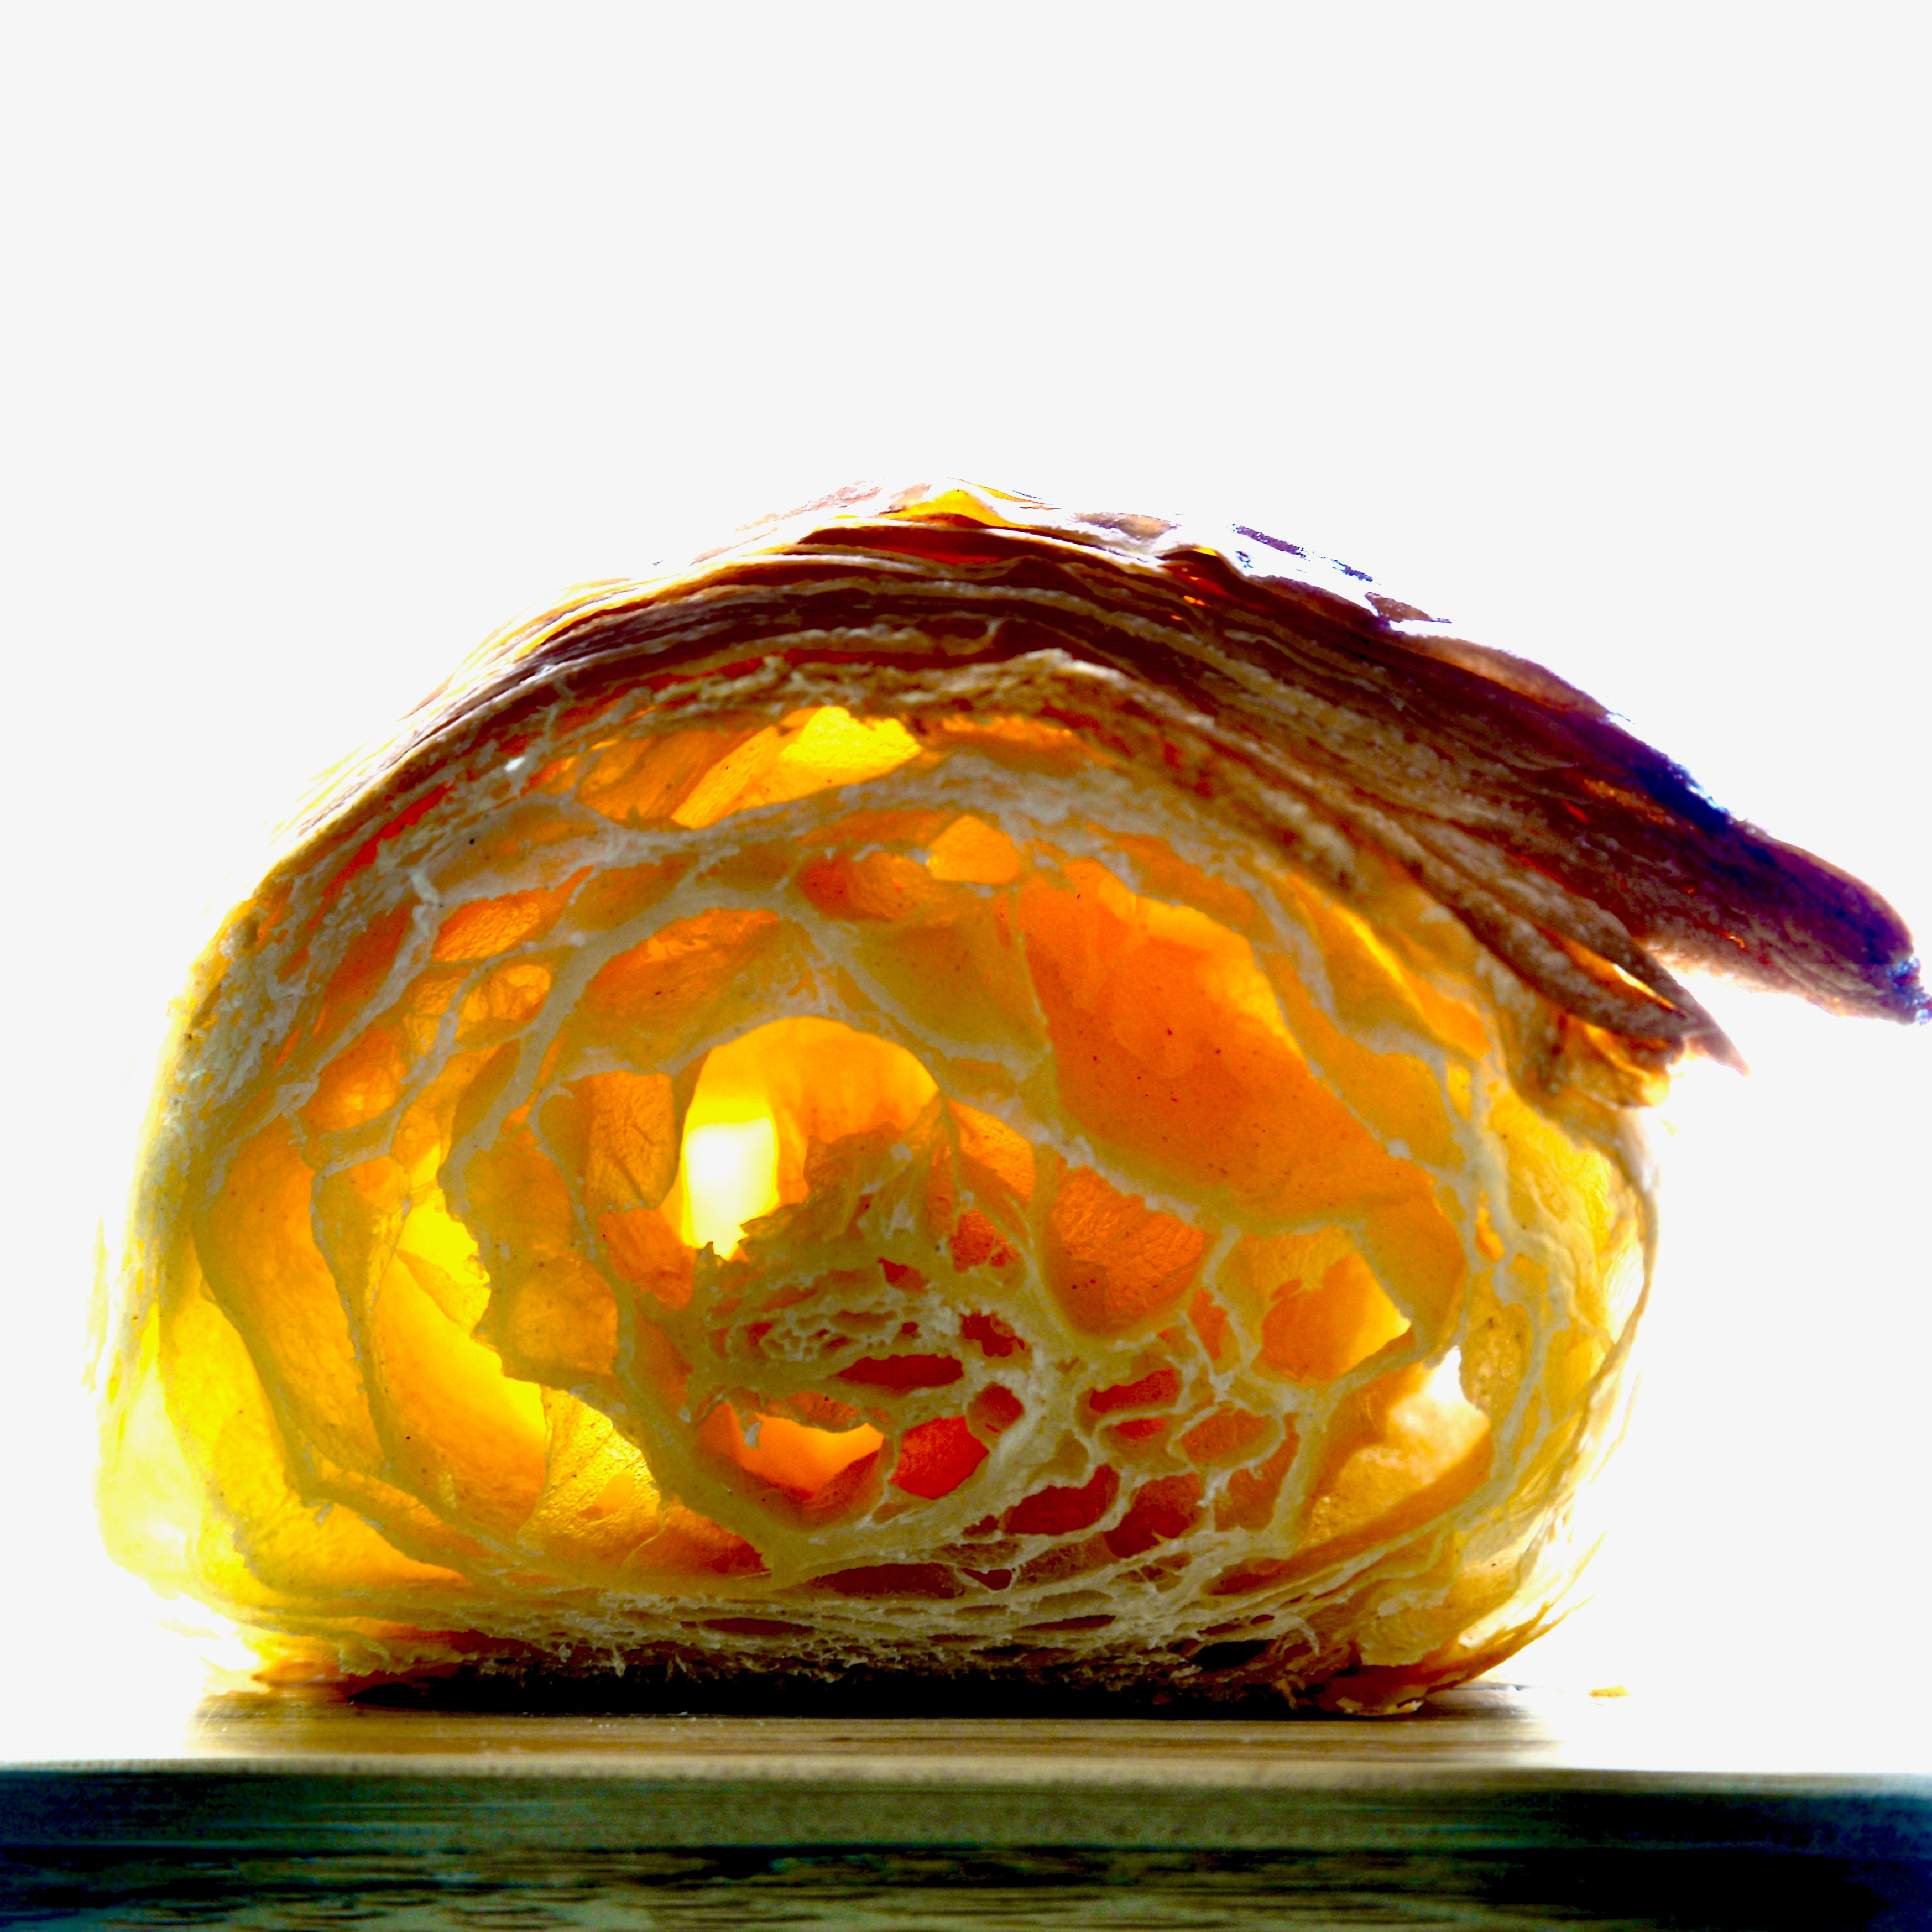
And that’s when you get to see what’s inside. There’s nothing special, or magical. There is no hidden treasure. But when the croissant re-expands after your teeth tried to pin the edges together, what is revealed is a delicate filigree of dough twisting and turning and coiling and wrapping around itself like a perfect display of the golden ratio. Ok, maybe my croissant isn’t a perfect Fibonacci spiral, but who’s counting?
How can you achieve a baked good that’s so beautifully organized on the inside? It’s not hard. But it is a bit tedious.
You know how when you look up recipes they’ll tell you how long it takes to prepare? Croissants are somewhere around 24 hours. “Largely unattended,” some recipes may say, which is true. This is definitely the kind of baking project you want to do when you’re going to be kicking around the house doing chores, binging Netflix, or maybe even working from home.
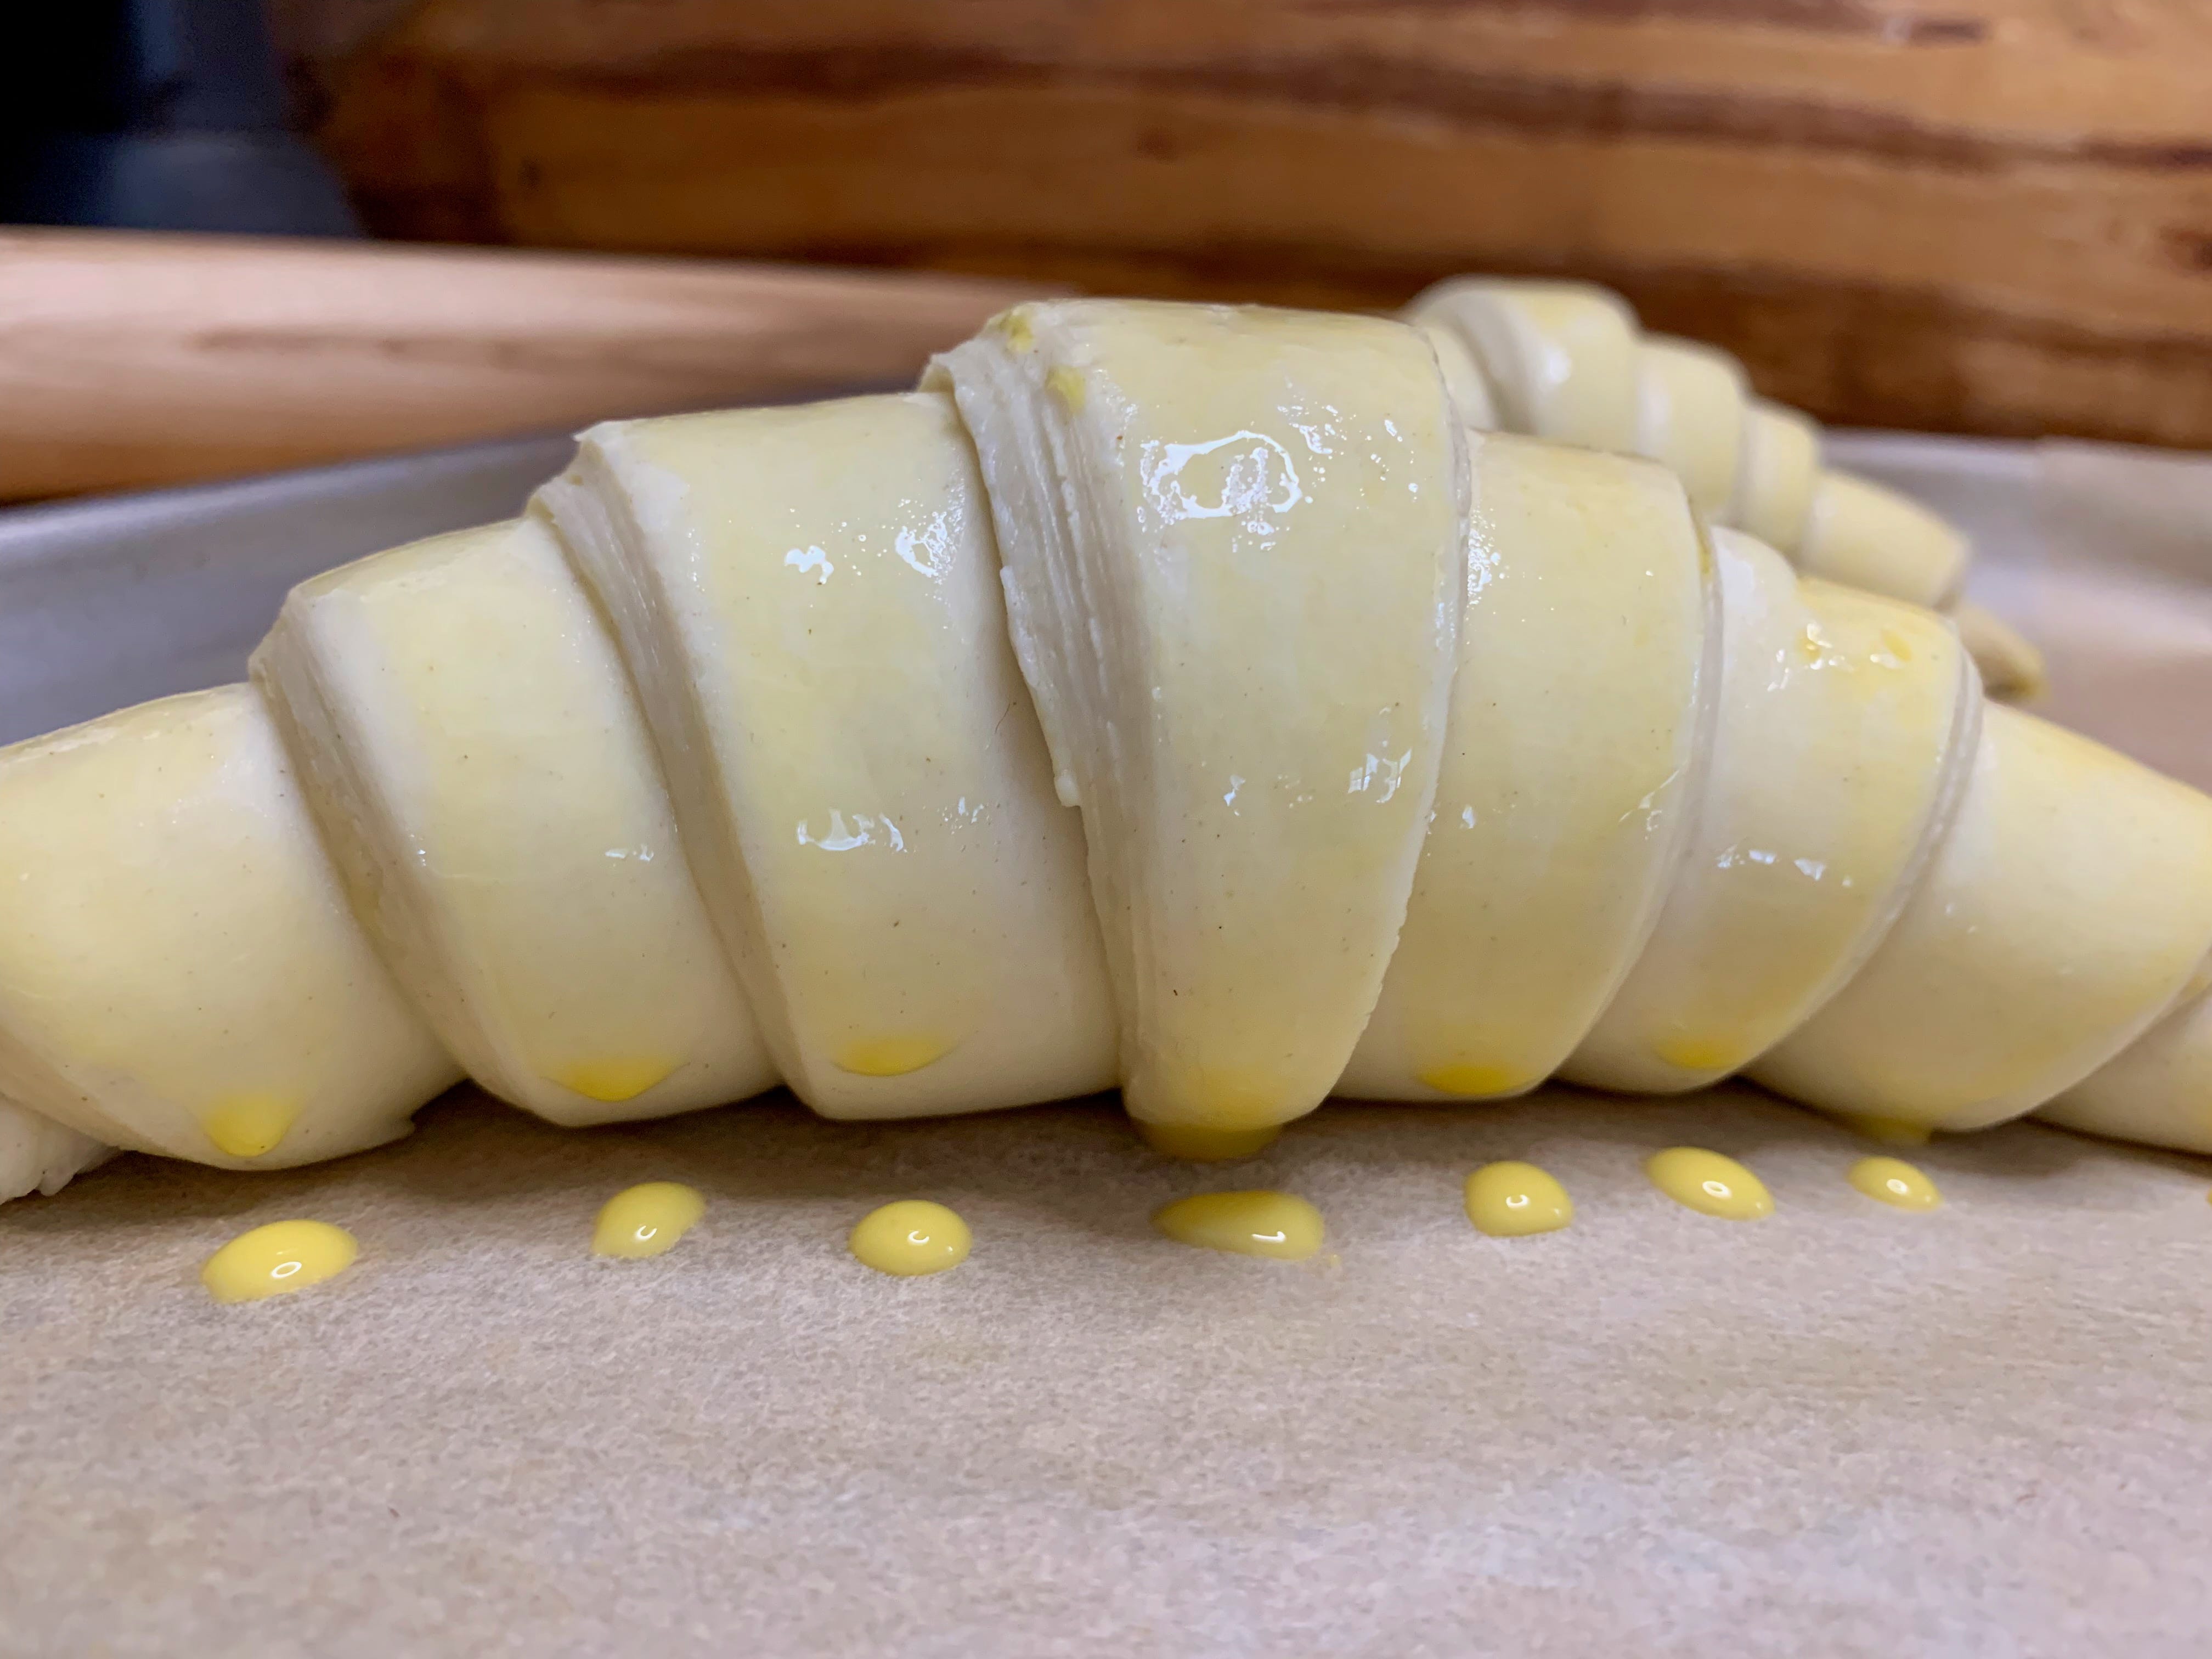
I tried two different recipes for my croissants. First, Joanne Chang’s from her first “Flour” cookbook and when that didn’t go as I was hoping, a friend suggested I take a look at the video Claire Saffitz made for New York Times Cooking. That 30 minute video was SOO helpful. I learned a lot of tricks, and recognized my mistakes, such as having too much flour on my work surface, croissants are supposed to jiggle after final proof, and don’t brush the edges with egg wash or you might glue them together. If you intend to give croissants a try, I highly recommend watching that first.
So that’s what I’m sharing with you today, the recipe by Claire Saffitz for New York Times Cooking, but reduced to two croissants. Here is the recipe and I’m not going into how I made it happen. It’s an extensive process, with a lot of freezing, chilling, rolling, pounding, trimming and then more of the same. If you want to know how I made it happen and what you should do as well, again…watch the video. I will, however, get you started to bring the dough together.
ingredients
151.2g bread flour
16.5g sugar
3g salt
1.75g yeast
53.5g room temperature water
30g room temperature milk
14.25g (~1 tablespoon) unsalted, European style, chilled, cut into small pieces, butter
85g (~6 tablespoons) unsalted, European style, chilled butter
1 large egg yolk and 1 tablespoon of heavy cream (I used milk) for brushing croissants
some directions
Stir together the flour, sugar, salt and yeast
Create a well in the center and add the water and milk
Mix together until a smooth-ish dough comes together. For me this was mostly kneading ingredients together in the bowl.
Let stand covered about 10 minutes
Spread the small pieces of chilled butter across the surface of the dough and knead until you form a smooth, stretchy ball that is not sticky.
I’m going to stop giving directions now. Because what’s up next is to cut the “+” into the dough before letting it rise and it’s a pretty cool result and if you haven’t watched it yet, go watch the video! Claire will show you how to do it and all that follows as well.
I hope to see you on the other side with your two beautiful buttery buildings, whatever architectural elements you decided to use.
Great pictures! Especially the one that is backlit.